For More Info!


How to Host a Website Using AWS Amplify: A Step-by-Step Guide
In this tutorial, I’ll walk you through the process of deploying your website using AWS Amplify. Whether you’re a beginner or a student looking to showcase your project, this guide will help you get your website live in no time.
Table of Contents
- Prerequisites
- Step 1: Build Your Website Locally
- Step 2: Create a GitHub Repository
- Step 3: Install Git and Set Up Version Control
- Step 4: Connect Local Repository with GitHub
- Step 5: Connect GitHub to AWS Amplify
- Step 6: Deploy Your Website on AWS Amplify
- Step 7: Add a Custom Domain (Optional)
- Step 8: Visit Your Live Website
- Conclusion
- Final Tips
Prerequisites
Before you begin, make sure you have the following:
- A GitHub account
- AWS account
- Visual Studio Code installed on your computer
- Basic knowledge of Git and GitHub
Step 1: Build Your Website Locally

The first step is to develop your website locally using your preferred text editor. For this tutorial, we’ll use Visual Studio Code (VS Code), but you can use any code editor of your choice.

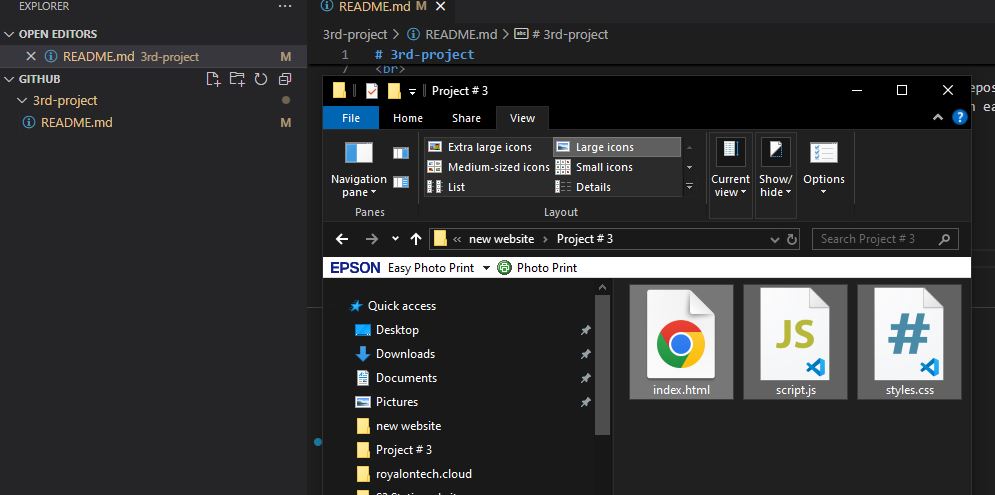
- Open VS Code and create your website project.
- Build your website with HTML, CSS, JavaScript, or any other web technologies.
- Once your website is ready, make sure all the files are in the project folder (e.g.,
index.html,styles.css, etc.).
Tip: Test your website locally to ensure everything works as expected.
Step 2: Create a GitHub Repository
Next, you’ll need to set up a GitHub repository to store your website files.
- Go to GitHub and create a new account if you don’t have one.
- Click on the New Repository button.
- Name your repository (e.g.,
my-website). - Choose the option to initialize the repository with a README file.
- Once created, note the repository URL (e.g.,
https://github.com/username/my-website).


Step 3: Install Git and Set Up Version Control
If you haven’t already, you’ll need to install Git on your local machine.
- Download and install Git from here.
- Once Git is installed, open your terminal/command prompt and configure your Git username and email:
git config --global user.name "Your Name" git config --global user.email "[email protected]"


Step 4: Connect Local Repository with GitHub
Now, let’s connect your local website project with the GitHub repository.

- Open your website project in VS Code.
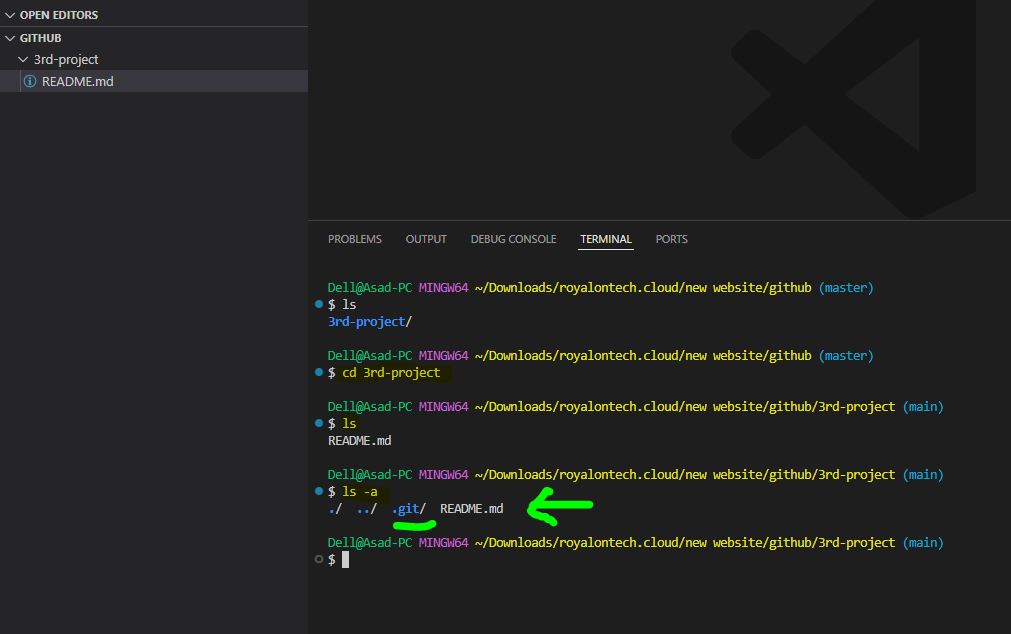
- Open the terminal in VS Code (View > Terminal).
- Initialize a new Git repository by running:
git init - Add the remote GitHub repository URL:
git remote add origin https://github.com/username/my-website.git - Add all the website files to Git:
git add . - Commit the files:
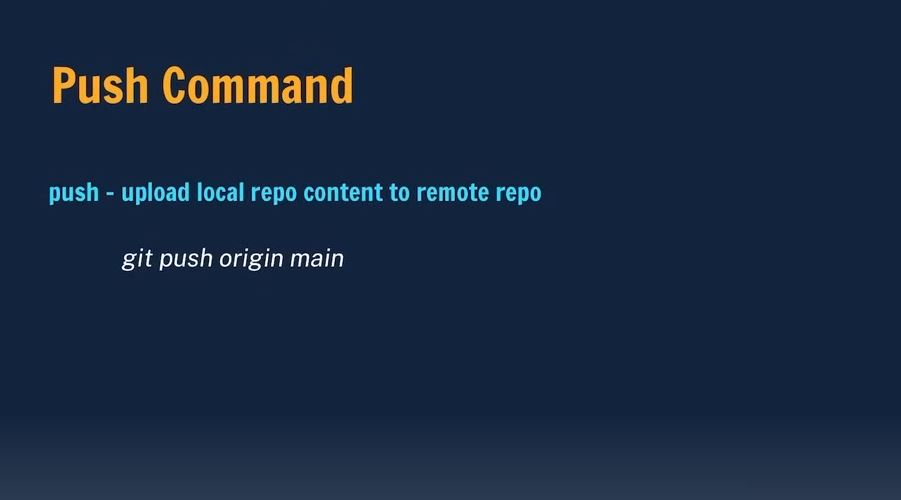
git commit -m "Initial commit" - Push the files to GitHub:
git push -u origin main
Your GitHub repository should now contain your website files.


Step 5: Connect GitHub to AWS Amplify
Now that your website files are on GitHub, it’s time to connect your GitHub repository to AWS Amplify to deploy your site.

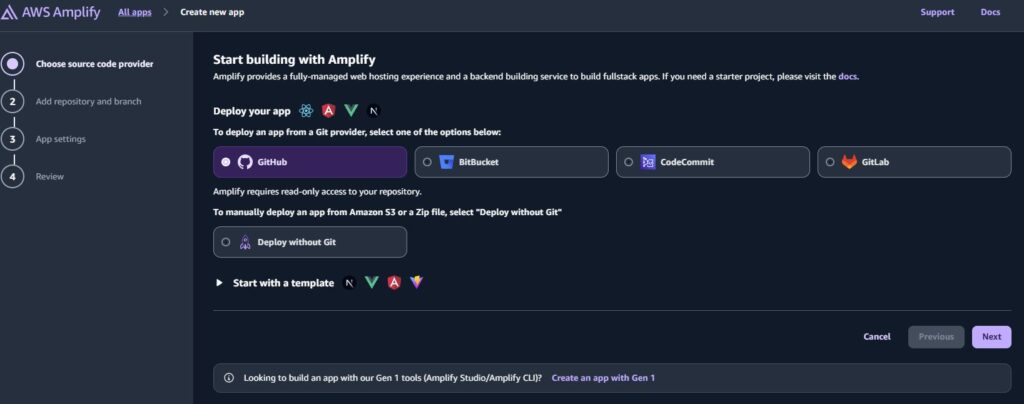
- Go to the AWS Amplify Console.
- Click on Get Started under “Host web app.”
- Select GitHub as your repository source.
- Authorize AWS Amplify to access your GitHub account.
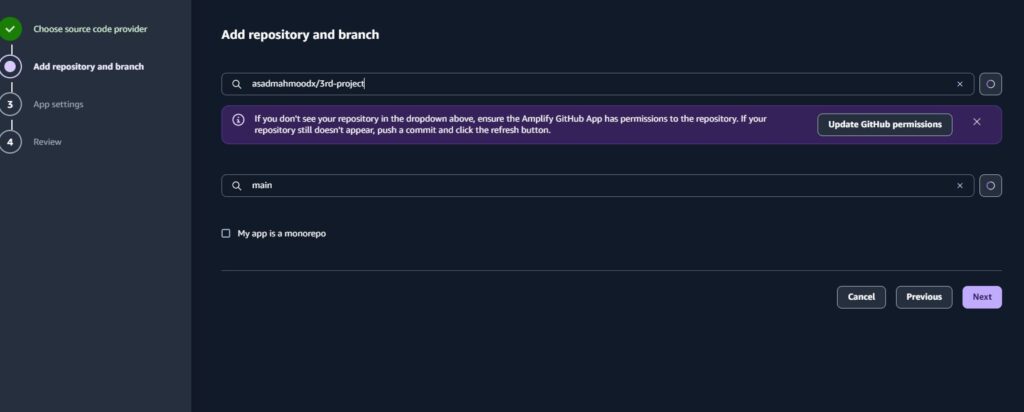
- Select the repository you just created (e.g.,
my-website) and choose the branch to deploy (usuallymain). - Click Next and follow the configuration steps to link your repository with Amplify.
- In the build settings, Amplify will automatically detect your website settings, but feel free to adjust them if needed.
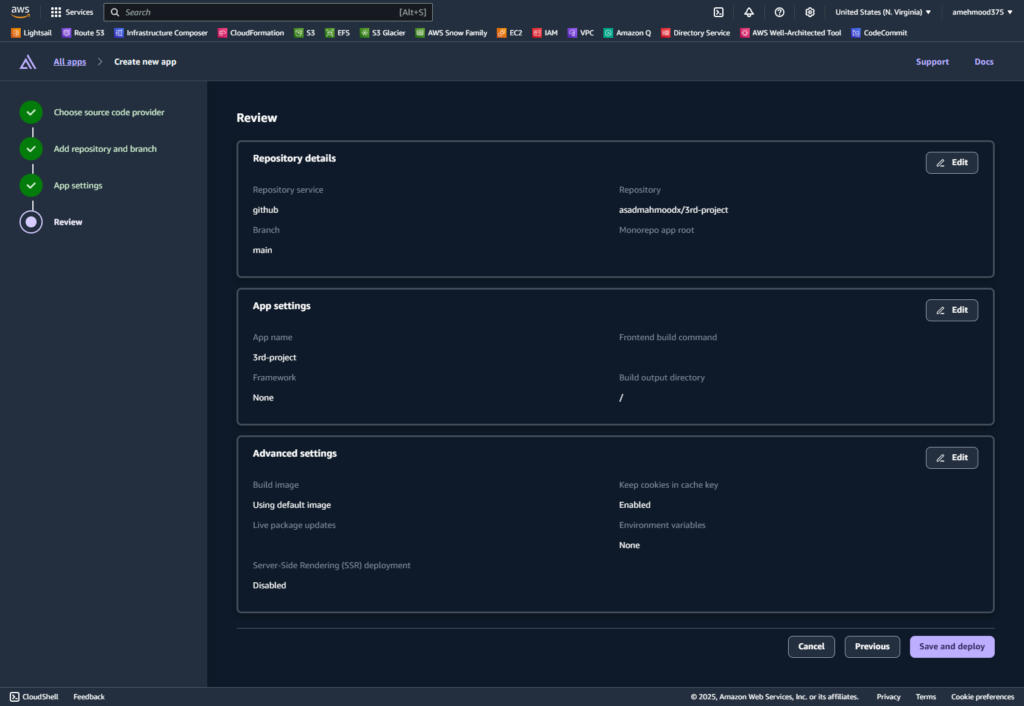
Step 6: Deploy Your Website on AWS Amplify
Once the repository is connected, Amplify will start the deployment process.
- Amplify will automatically build and deploy your website.
- You’ll see a Build status in the Amplify dashboard.
- Once the build is successful, your website will be live!

Step 7: Add a Custom Domain (Optional)
If you want to use a custom domain for your website, you can add it easily in Amplify.

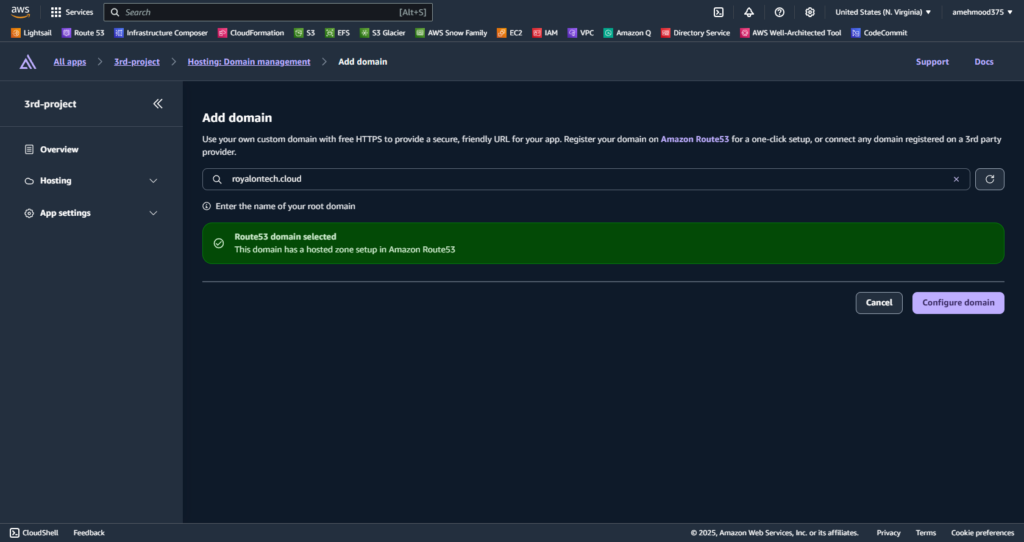
- Go to the Domain Management section in AWS Amplify.
- Add your custom domain (e.g.,
www.mywebsite.com). - Follow the on-screen instructions to point your domain to AWS Amplify by updating your DNS records.

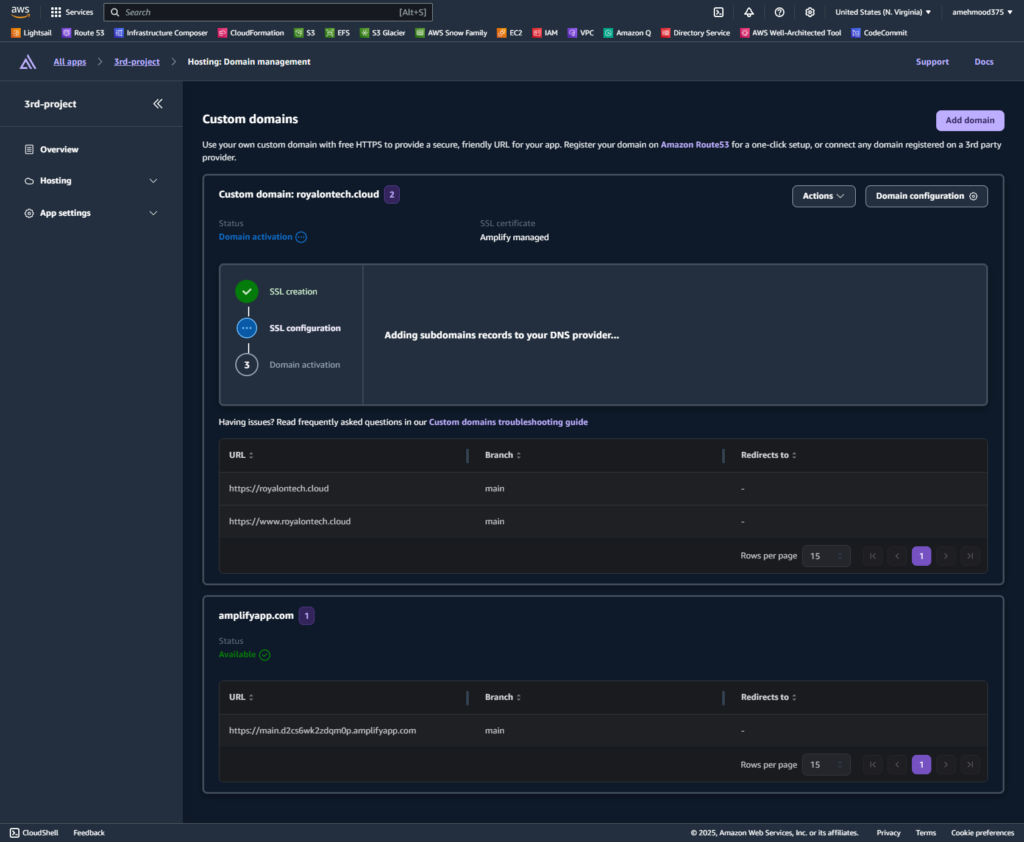
Once the domain is verified, it will be linked to your deployed website.
Step 8: Visit Your Live Website
After a successful deployment, your website will be live with the default Amplify domain (e.g., https://my-website.amplifyapp.com).

If you added a custom domain, your website will be accessible at that URL.

Conclusion
Congratulations! You’ve successfully deployed your website using AWS Amplify.
This process involves setting up GitHub, connecting your repository to Amplify, and deploying your site to the cloud, all with minimal effort.
Amplify takes care of the deployment, so you can focus on improving your site.

Final Tips
- Continuous Deployment: Every time you push changes to your GitHub repository, AWS Amplify will automatically rebuild and redeploy your site.
- Monitor: Use the Amplify Console to monitor your website’s performance and logs.